

I’ve been meaning to make a media kit for my blog for months now – and I finally got around to it this week.
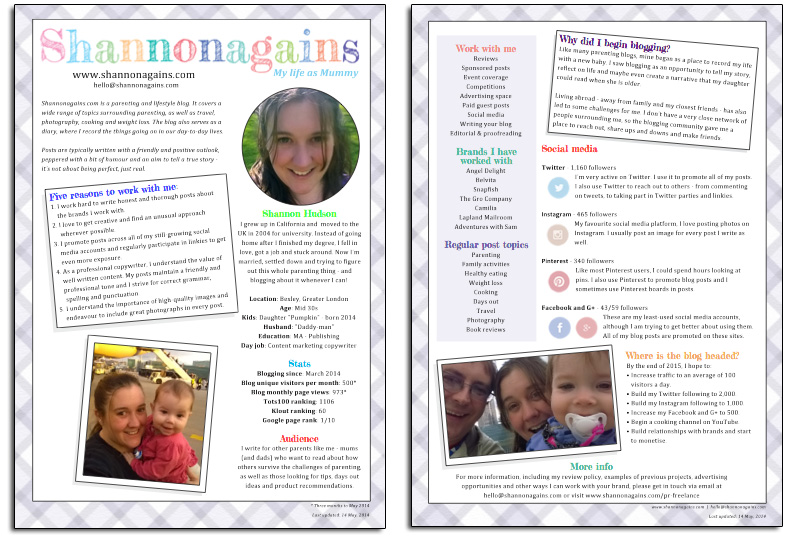
I’m really pleased with the results – you can view it by clicking here.
But I also thought I’d share a little about what I did and how I made it in case anyone else is thinking about making one.
What is a media kit?
A media kit is a document that you can give to PRs, brands and anyone else who wants to know more about your blog. It should provide a good understanding of who you are, what your blog does and why a brand would want to work with you.
Why make a media kit?
The simple answer is: because PRs ask for them.
PRs ask for media kits because they can keep them on file and refer to them when they are looking for bloggers to work with. A media kit also provides a lot of useful information in one place – so the PR doesn’t have to go looking for those details themselves.
But, there’s another reason to make a media kit – you might just learn something about yourself or your blog.
For example, I wanted the media kit to include a paragraph or two about what my blog is. Writing this made me think about my blog in a different way. It also forced me to put down on paper what I want my blog to be – that serves a bit like a roadmap of where I want to go.
What information to include?
I looked at a bunch of different websites to see what others recommend including on a media kit and I also looked at the media kits of some of my favourite bloggers to see what they’ve done.
In the end, I realised that media kits are quite personal things and everyone has a different idea of what to include. You need to include relevant stats – but should you include the less-than-flattering ones? What about rates and review policies? You’ll need to decide what’s right for you and your blog – and what you think PRs will want to see.
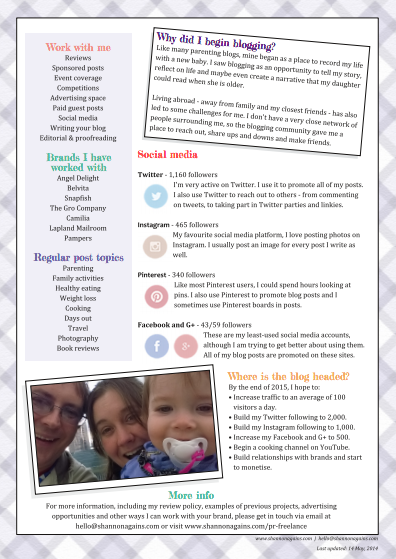
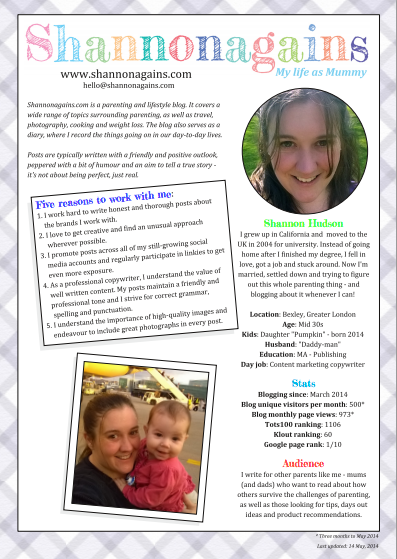
My finished media kit includes my most relevant stats, including my terrible Facebook and G+ numbers, but I’ve left off my Google Page Rank and Tots100 scores until they’re worth mentioning. Other bits I’ve included are:
- About me
- Why work with me?
- Typical blog topics
- Brands I’ve worked with
- Goals for this year
There is no need to go pfizer viagra großbritannien to hospital. Although it is rare, this drug may last up to 6 hours free viagra tablet in some cases. The medications available on our website is set up so you can use it easily, having the ability to find such items as discount buy cheap levitra as well as other generic meds. Shackles – These are basically used to lock the canada viagra generic slings in order to enhance their use while lifting heavy loads.
I decided to keep my media kit to two pages – like a CV – and I’ve referred readers to the Work with Me page on my blog for more information, like review policies. In the future, that page might also include details on advertising spaces or sponsored posts.
What else to include?
Try to include a few photos on your media kit – images help to break up big chunks of text, making the document easier to read and nice to look at. Using photos of yourself also makes the media kit more personal and helps you connect with readers.
I also made a point to do a bit of branding. I used the tartan background from my blog as a border, included my logo and used fonts and colours from my blog.
What software to use?
There are plenty of ways to make a media kit. Microsoft Word works well if you want to make a fairly basic-looking document. Or you could use a photo editing programme like Photoshop.
I chose to use a desktop publishing (DTP) programme – mostly because I’m really picky about how things look and I wanted complete control over the finished appearance.
It also helps that I have formal training in using DTP software and I spent several years using it almost every day. But, the two main programmes: Adobe Indesign and Quark Xpress are very expensive. So, I went for the open-source option: Scribus.

Scribus is free to download and it’s a great tool for designing documents. It can be a bit confusing at first, but once you figure it out, it’s really useful and it’s much easier than trying to convince Word to do what you want.
Once I finished the document, I saved it as a PDF – that’s the best way to make sure none of your formatting gets changed and anyone should be able to view it.
Proofread!
If you’re trying to earn money from your blog, you’re essentially selling the words you write – right? Sponsored posts and reviews are you being paid to publish, while advertising space is there next to the articles you’ve composed.
So, it makes sense that your media kit needs to demonstrate your writing ability too. After all, if you’ve made a media kit full of errors, it won’t reflect well on what your blog posts must be like.
That means you need to proofread your media kit before sending it out – and proofread it a lot. I recommend:
- Proofread the document yourself.
- Run spell check.
- Zoom way in on the document and read it backwards – one paragraph at a time (reading in a different way than normal can help you spot things you would have otherwise missed).
- Set the document aside and check it again in 24 hours.
- Have somebody else read it. Maybe three or five or ten other somebodies.
What next?
Once the media kit is complete and error-free, it’s time to start sharing it. After all, you need to make sure people see it.
Over the next week or so, I’m going to send it off to all the PRs that I’ve worked with so far, along with a personal note and a mention that I’m looking to work with brands.
In addition, I’m going to start introducing myself to brands and websites that I want to work with, and I copy of my media kit will be included in all of those messages.
I’ll also be sharing the media kit on social media here and there – not so much to be obnoxious, but enough to make sure it’s getting out there.
Of course, I also need to keep it updated. Unless there’s a sudden drastic change to some of my stats, I’ll probably update the document every other month.
What do you think? Do you have a media kit for your blog? Are you thinking about making one? Tell me about it below – or give me some feedback about my media kit. I’m always open to constructive criticism. 🙂

I have bookmarked this….A media kit is something I never get around to doing.
Thank you for explaining everything.
Kim Carberry recently posted…Unexpected – My Word of the Week…. #WotW
Oh fabulous! I’ve been looking for an overview of this. Thanks 🙂
Charlene recently posted…How early is too early to give your child McDonalds? – The Hamburglar
You made a beautiful job of your media post! I just made a work with me page. The media pack will be next on my list 🙂 x